

The oven’s warm, and I can already smell the sweet, buttery crust. Cookie Monster Cheesecake is about to become the star of the night.
This one’s for those fun get-togethers when you want to impress but don’t have hours to spare. It’s a crowd-pleaser that skips the tedious water bath — no soggy crust here! Just mix, bake, and chill for a few hours (trust me, it’s worth the wait). You’ll be diving in before you know it!
Why You’ll Love This Cookie Monster Cheesecake
- Super Easy: You just mix, pour, and bake. Even if you’re not a pro in the kitchen, it’s totally doable!
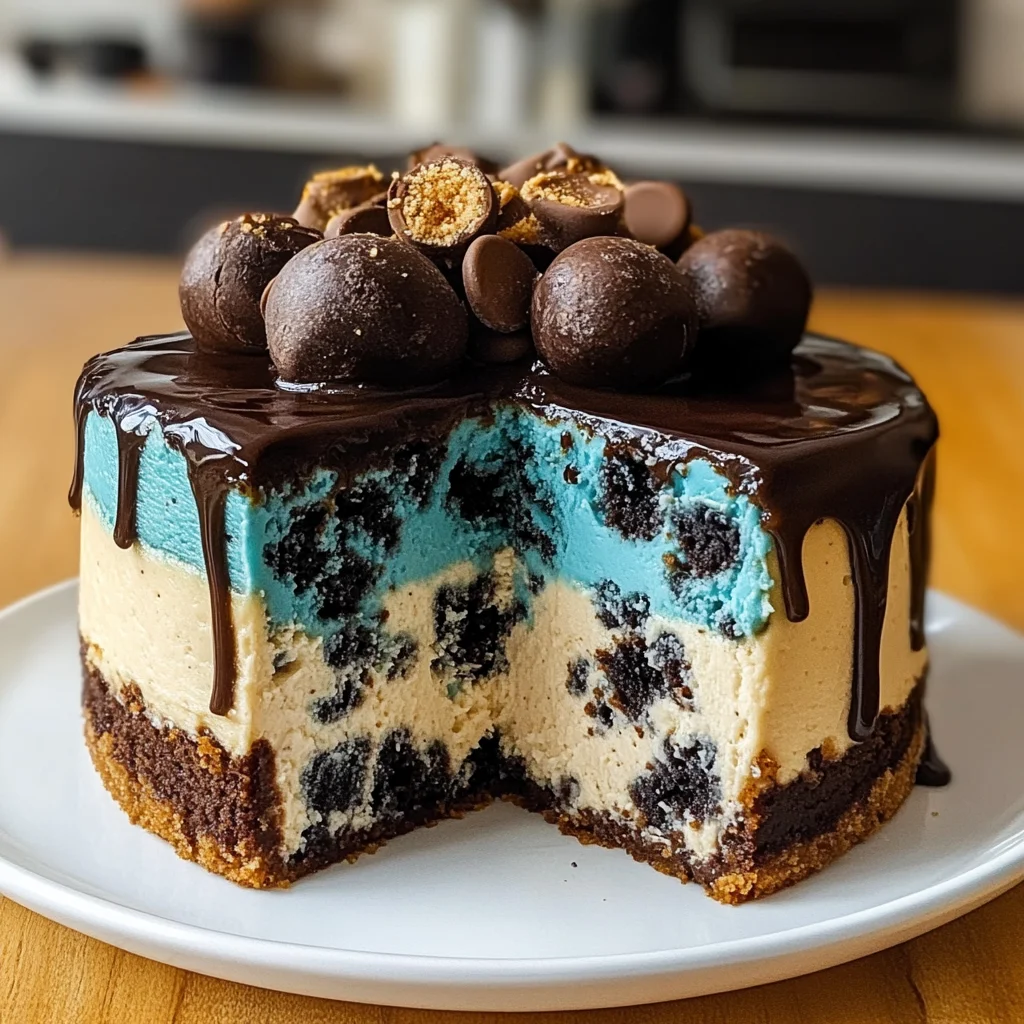
- Fun Flavor: It’s like a birthday party in your mouth — sweet, creamy, and loaded with mini chocolate chip cookies.
- Crisp-Tender Crust: The graham cracker crust is the perfect balance of crunchy and buttery, giving it that lovely texture.
- Party-Ready: Great for birthdays or casual get-togethers — just add whipped cream and sprinkles for a showstopper vibe!
- Chill Time Required: It needs at least 4 hours in the fridge before serving (I know that feels like forever, but it’s so worth it).
Cookie Monster Cheesecake Ingredients
For the Base:
graham cracker crumbs (2 cups) — Crush those graham crackers finely, or your crust’ll be crumbly and fall apart.
unsalted butter (1/2 cup) — Melted unsalted butter’s a must for binding; don’t use margarine, it’s a disaster.
cream cheese (2 packages) — Use full-fat cream cheese, or your cheesecake’ll end up grainy and sad.
granulated sugar (1 cup) — Granulated sugar’s gotta be precise; too little makes it bland, too much’s overwhelming.
vanilla extract (1 teaspoon) — Always use pure vanilla extract, or you’ll miss that rich flavor—no artificial stuff, please!
eggs (3 large) — Room temp eggs mix better; cold ones’ll clump and ruin your smooth texture.
blue food coloring (1 cup) — Grab gel blue food coloring for vibrant color; liquid stuff just won’t cut it.
For the Topping:
mini chocolate chip cookies (1 cup) — Don’t skimp on mini chocolate chip cookies; generic brands just don’t have the same taste.
whipped cream (1 cup) — Whipped cream should be fresh, or it’ll collapse and ruin your presentation.
blue sprinkles (1/4 cup) — Use edible glitter if you can’t find blue sprinkles; they’ll give that fun pop.
Full measurements in the recipe card below.
How to Make Cookie Monster Cheesecake
1. Preheat the Oven: Set your oven to 325°F (163°C). This’ll get it nice and hot for baking your cheesecake just right.
2. Make the Crust: In a mixing bowl, combine graham cracker crumbs and melted butter. Mix until it looks like wet sand. Press this mixture firmly into the bottom of a 9-inch springform pan to form a solid crust.
3. Bake the Crust: Pop that crust in the oven for 10 minutes. You’ll know it’s ready when it smells buttery and delicious! Let it cool after baking.
4. Mix the Filling: In a large bowl, beat together softened cream cheese, granulated sugar, and vanilla extract until smooth. Then add in your room-temp eggs, one at a time, mixing well after each addition. And don’t forget to stir in that vibrant blue food coloring until you hit your desired shade!
5. Combine and Bake: Pour the cheesecake filling over your cooled crust in the springform pan. Bake in the oven for 50 minutes — you’ll want to see a slightly wobbly center when it’s done.
6. Cool Gradually: Turn off the oven, but leave the cheesecake inside for an hour (this helps prevent cracks). Don’t rush this part; if you pull it out too early, it’ll be soupy in the middle!
7. Chill Before Serving: After removing from the oven, let it cool to room temperature before covering and refrigerating for at least 4 hours or overnight. When you’re ready to serve, top with whipped cream, mini chocolate chip cookies, and blue sprinkles for that Cookie Monster Cheesecake magic!
Exact quantities in the recipe card below.
How to Store Cookie Monster Cheesecake
- Room Temperature: Don’t leave it out for more than 2 hours. It’s best stored in the fridge, but if you need to keep it out for a bit, cover it with plastic wrap.
- Refrigerator: Store it in an airtight container or cover it tightly with plastic wrap. It’ll last about 3 to 5 days, but the whipped cream topping might start to weep a little over time (just a heads up).
- Freezer: You can freeze slices wrapped individually in plastic wrap, then put them in a freezer-safe bag. They’ll hold up for about 1 to 2 months. The texture might change a bit after thawing, so it’s not as great as fresh.
- Reheating: If you want to enjoy a slice warm, pop it in the oven at 300°F (150°C) for about 10 minutes until it’s warmed through and smells heavenly. Just keep an eye on it; you don’t want it getting too hot and losing that creamy goodness!
What to Serve with Cookie Monster Cheesecake?
It’s super sweet and rich, so I love to balance it out with something refreshing or crunchy on the side. Here are some ideas that really work:
- Fresh Berries: The tartness cuts the sweetness perfectly, making each bite feel lighter and more balanced.
- Mint Tea: The cool, herbal notes contrast nicely with the dessert’s sweetness, plus it’s super easy to brew.
- Vanilla Ice Cream: Cold and creamy, it adds a silky texture that complements every slice beautifully.
- Citrus Sorbet: A scoop of lemon or lime sorbet brightens up the flavor profile with a zesty kick. (Just freeze for a few hours!)
- Crushed Graham Cracker Topping: Try sprinkling some on top for added crunch and texture contrast without any extra prep.
- Chocolate-Covered Pretzels: The salty-sweet combo gives a fun crunch that plays against the creamy cake.
- Caramel Drizzle: A drizzle adds an extra layer of flavor and richness without feeling too heavy. Just warm it up slightly for easy pouring!
Cookie Monster Cheesecake Variations
Here’s how to play with this recipe and make it your own!
- Chocolate Swirl: Add 1/2 cup melted chocolate to the cheesecake filling for a rich, chocolaty twist.
- Oreo Crust: Substitute graham cracker crumbs with crushed Oreos in the crust for an extra cookie crunch.
- Peanut Butter Drizzle: Drizzle 1/2 cup melted peanut butter on top before adding whipped cream for a nutty kick.
- Confetti Cheesecake: Toss in 1/4 cup mini candies with the chocolate chip cookies for a festive touch.
- Caramel Topping: Drizzle store-bought caramel sauce over the whipped cream before serving for a sweet upgrade.
- Reduced Sugar Option: Use 3/4 cup granulated sugar instead of 1 cup if you’re cutting back on sweetness (you won’t miss much).
- Extra Color Burst: Mix in an additional 1/4 cup blue food coloring for an even bolder blue hue in your cake!
Make Ahead Options for Cookie Monster Cheesecake
I love making the Cookie Monster Cheesecake ahead of time. You can prepare the crust and filling a day in advance; just store them separately in airtight containers in the fridge. The baked cheesecake holds well for about 3 days if it’s wrapped tightly or kept in its springform pan. Just remember, toppings like whipped cream and cookies should wait until right before serving to stay fresh and crunchy (trust me on this). I wouldn’t recommend adding the sprinkles until you’re ready to dig in, either. All that said, you’ll want to enjoy this treat within a week. Just keep it cool!
Cookie Monster Cheesecake Recipe FAQs
Can I make Cookie Monster Cheesecake ahead of time?
Absolutely! This recipe is perfect for making a day in advance. After baking, let it cool to room temperature, then cover and refrigerate for at least 4 hours or overnight. This chilling time helps the flavors meld together nicely, and you’ll get that creamy texture everyone loves. Just remember to add your toppings right before serving for that fresh look!
Why did my Cookie Monster Cheesecake crack?
Cracks usually happen when the cheesecake cools too quickly or if it’s overbaked. To avoid this, leave it in the oven after turning it off for about an hour (seriously, don’t skip this part). You’ll know it’s done when the center’s slightly wobbly but not soupy. And always let it cool to room temp before chilling — rushing can lead to cracks, and nobody wants that.
What can I substitute for graham cracker crumbs in this dish?
If you’re out of graham crackers, you can use crushed Oreos or vanilla wafers as a base instead. Just keep in mind that Oreos will give a chocolatey twist! You still need melted butter to bind everything together, so don’t skip that part. And be careful with how finely you crush them; bigger chunks could make your crust crumble apart!
How do I store leftover Cookie Monster Cheesecake?
Store any leftovers in an airtight container in the fridge for up to 5 days (if there’s any left!). Make sure it’s well covered so it doesn’t absorb any weird fridge smells — trust me, no one wants garlic cheesecake! You can also freeze slices if you’re feeling ambitious; just wrap them tightly in plastic wrap before tossing them in a freezer bag.
Final Thoughts on Cookie Monster Cheesecake
This Cookie Monster Cheesecake is worth making just for that creamy, smooth texture you get from using full-fat cream cheese. Honestly, it makes all the difference! Plus, the vibrant blue color and fun toppings turn it into a showstopper that’s as much about the fun as the flavor. If you’ve been putting this off, tonight’s the night. I promise you’ll want to share it (or not). Let me know how yours turned out in the comments!
Cookie Monster Cheesecake
Ingredients
Method
- Preheat the oven to 325°F (163°C).
- In a mixing bowl, combine graham cracker crumbs and melted butter. Mix until well combined.
- Press the mixture firmly into the bottom of a 9-inch springform pan to form the crust.
- Bake the crust in the preheated oven for 10 minutes, then remove and let cool.
- In a large bowl, beat the softened cream cheese until smooth.
- Add granulated sugar and vanilla extract, mixing until well combined.
- Add the eggs one at a time, mixing well after each addition.
- Stir in the blue food coloring until the desired color is achieved.
- Pour the cheesecake filling over the cooled crust in the springform pan.
- Bake in the oven for 50 minutes, or until the center is set but slightly wobbly.
- Turn off the oven and leave the cheesecake inside for an additional hour to cool gradually.
- Remove the cheesecake from the oven and cool to room temperature.
- Cover and refrigerate for at least 4 hours or overnight before serving.
- Before serving, top the cheesecake with whipped cream, mini chocolate chip cookies, and blue sprinkles.